
Hey everyone! I recently tackled a project for a customer looking to roll out encryption at scale, and I’m excited to share my experience. I put Red Hat Enterprise Linux (RHEL 9.6 & 10) encryption and RAID strategies to the test, focusing on operational efficiency.
I was seriously impressed with the Tang server and LUKS Clevis combination. It allowed for automated unlocking of encrypted volumes, which is a huge win for large-scale deployments. No more manual key management! Also successfully implemented software RAID with LUKS encryption and LVM on the disks.
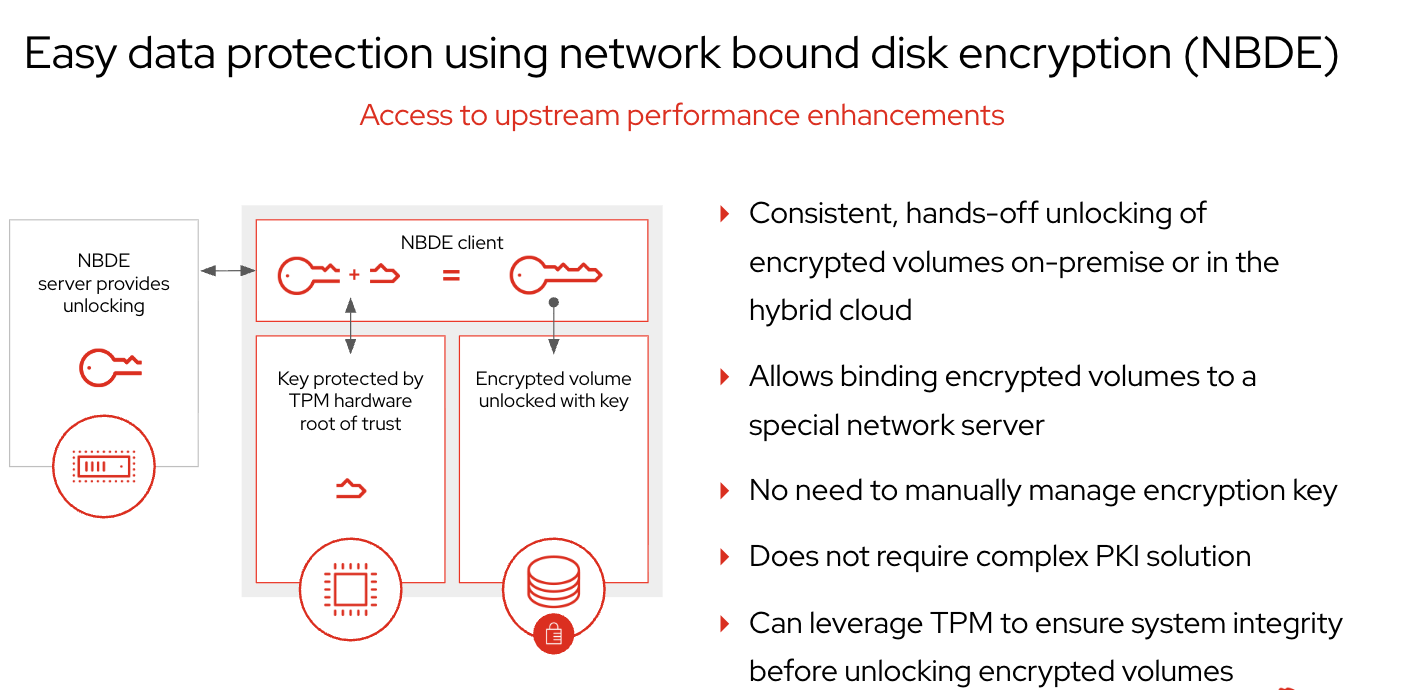
Easy Data Protection using Network Bound Disk Encryption (NBDE)
Benefits of NBDE with Tang server and Clevis for Encryption
Here are the key benefits of using Network Bound Disk Encryption (NBDE) with Tang server and Clevis for RHEL encryption:
- Consistent, hands-off unlocking: Encrypted volumes can be unlocked automatically, whether on-premise or in the hybrid cloud.
- Simplified key management: No need to manually manage encryption keys.
- No complex PKI solution required: It avoids the need for intricate Public Key Infrastructure setups.
- TPM leverage: Can utilize Trusted Platform Module (TPM) to ensure system integrity before unlocking encrypted volumes.
- Stateless Tang server: Tang is stateless, making it easy to replicate and providing redundancy without native clustering. It never interacts with client keys, enhancing security.
- Automated decryption with Clevis: Clevis provides a pluggable framework for automated decryption of LUKS volumes.
The testing covered various scenarios, including encrypting and decrypting RHEL servers across different hardware, performing software RAID with encryption, and even reassembling disks after a full teardown. It’s clear that this solution offers robust and secure data protection.
Test Case #1: Stateless Encryption
This test aimed to ensure the ability to encrypt and decrypt RHEL servers across two different hardware chassis.
A Tang server was used for Network Bound Disk Encryption (NBDE) operations over two isolated networks with the same set of keys. Due to physical constraints, Trusted Platform Module (TPM) could not be utilized, so a passphrase option was made available if the Tang server was unavailable.
Test Case #2: RAID -> LUKS (encrypt) -> LVM (xfs)
- This test focused on performing Software RAID using
mdadm, followed by encrypting and decrypting the disks with the Tang server. - It included two sub-scenarios:
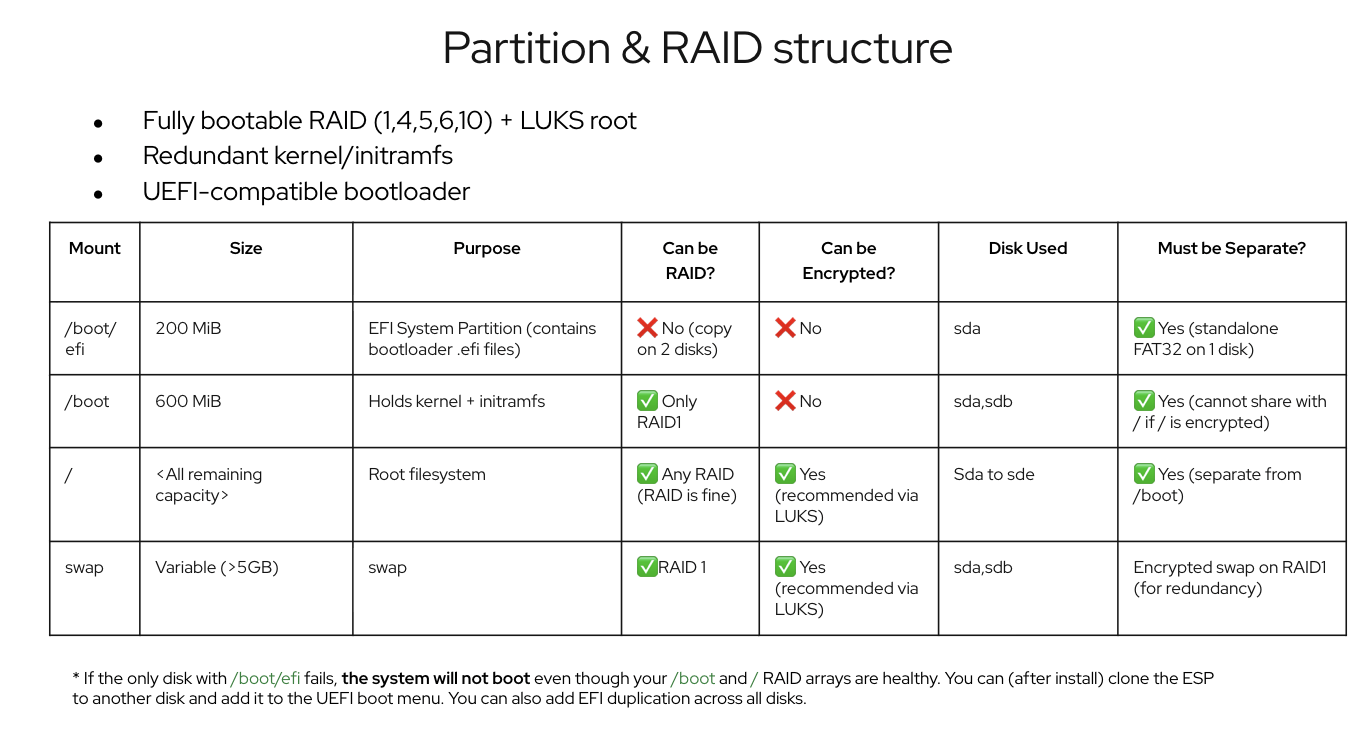
- Fresh Installation: A fresh installation with 5 disks configured in RAID-6, with LUKS layered over the
/dev/md0partition and an XFS filesystem inside./bootand/boot/efipartitions were not encrypted as GRUB cannot boot directly from RAID-6. - Expanded Disks: This scenario applied the RAID -> LUKS -> LVM mechanism to the
/datapartition, withsdaas a standalone encrypted disk with automated decryption via the Tang server.
- Fresh Installation: A fresh installation with 5 disks configured in RAID-6, with LUKS layered over the
Test Case #3: Simulate a full disaster and re-assemble the disk.
- This test involved simulating a full teardown (unmounting, closing cryptsetup, deactivating volume groups, and stopping
mdadm) and then reactivating the disks by reassemblingmdadm, opening cryptsetup, activating volume groups, and mounting the filesystems.
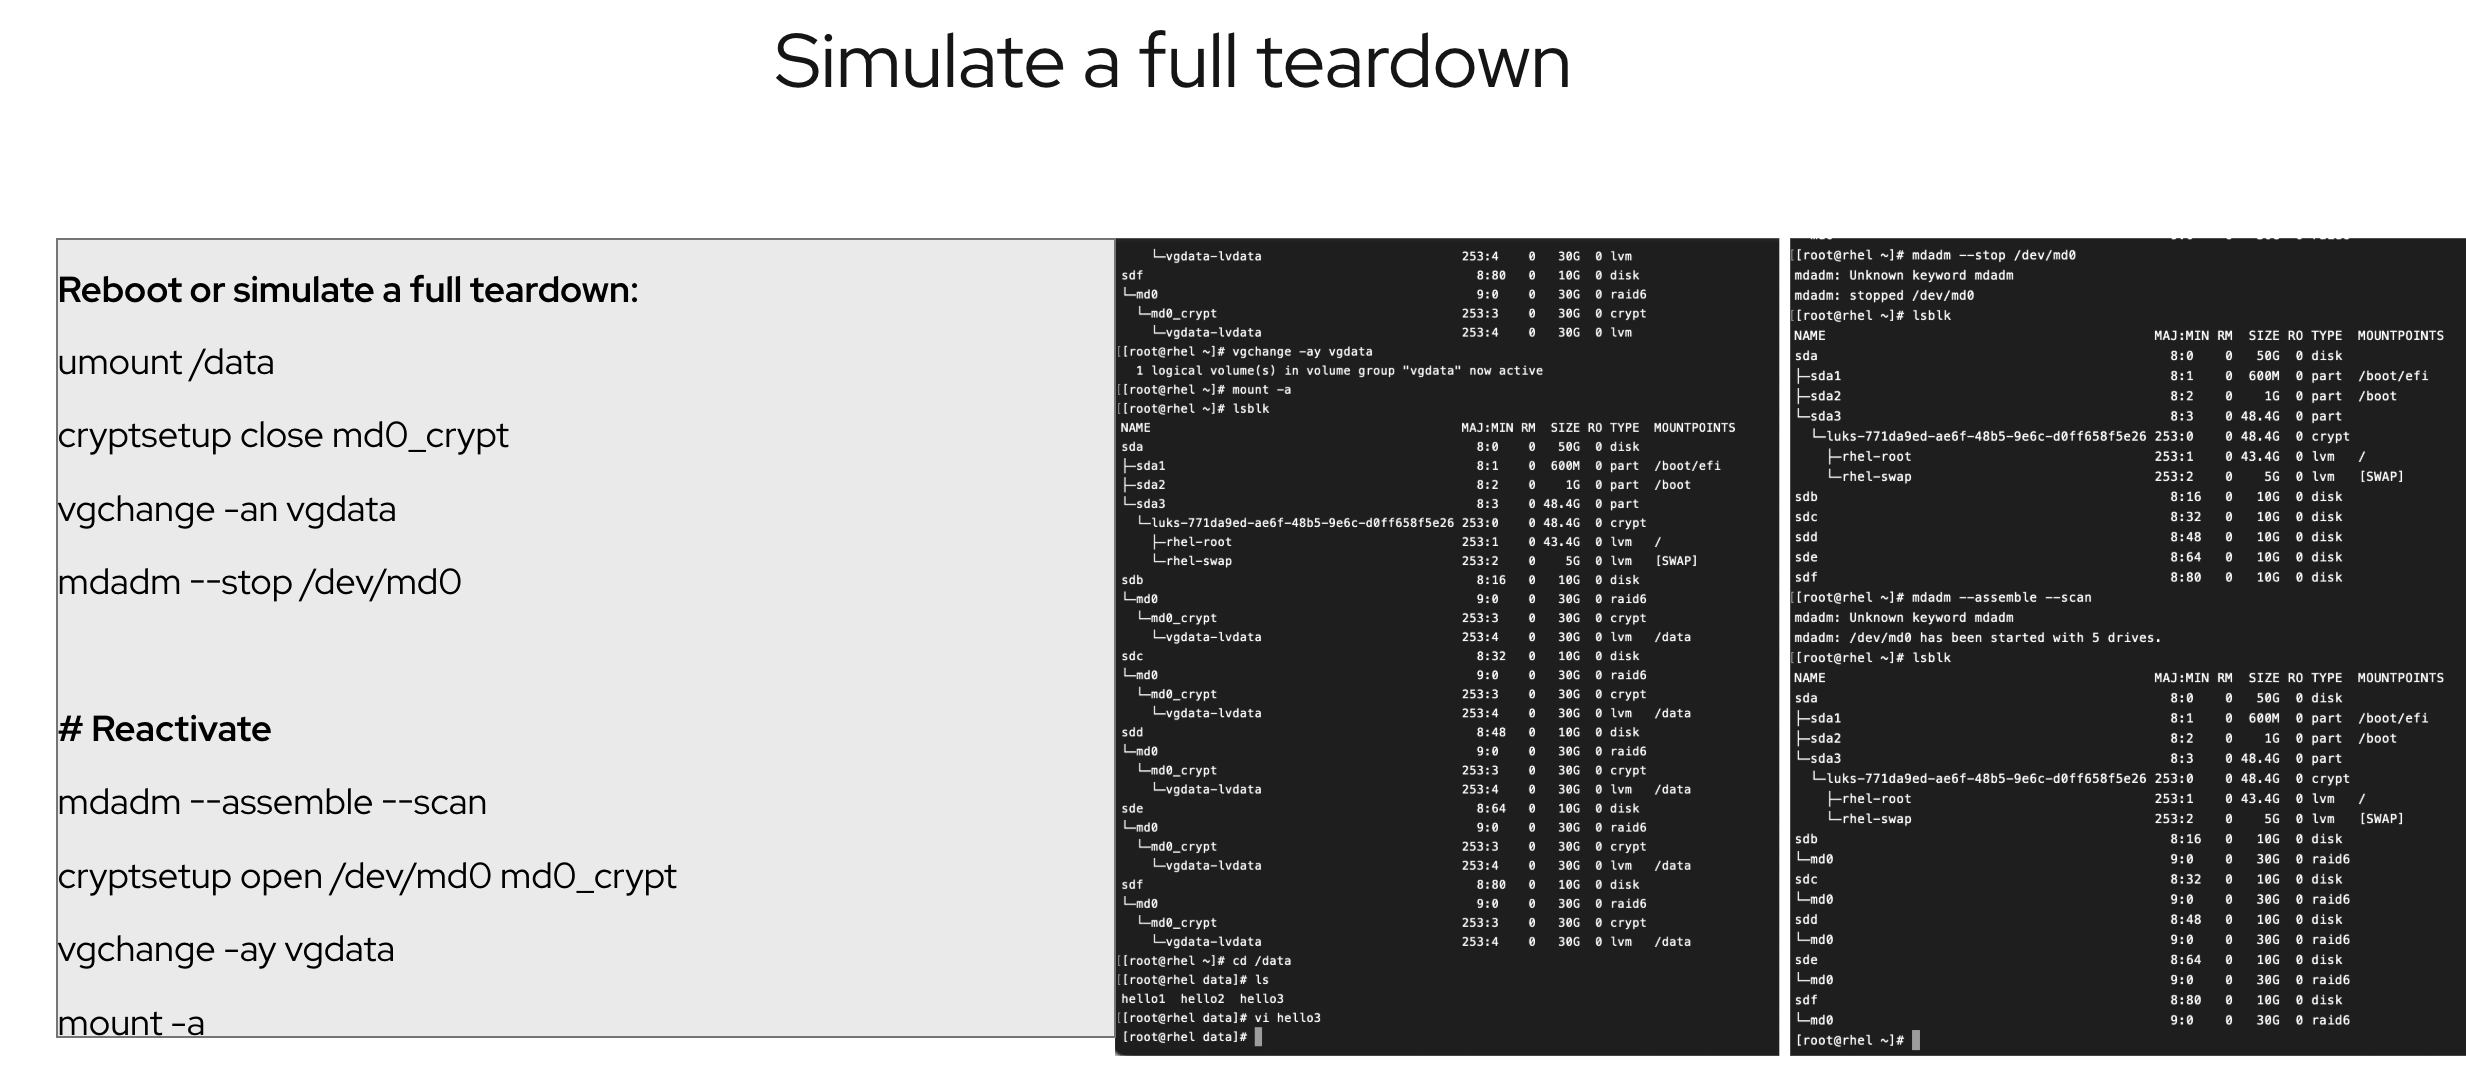
I essentially put the system through a full teardown. This involved:
- Unmounting the
/datapartition - Closing the
md0_crypt(LUKS encrypted device) - Deactivating the
vgdatavolume group - Stopping the
/dev/md0RAID array - It’s like hitting the reset button on your storage setup!
But the real magic is in the reactivation. I then brought everything back online with these steps:
- Reassembling the RAID array using
mdadm --assemble --scan - Opening the LUKS encrypted device with
cryptsetup open /dev/md0 md0_crypt - Activating the volume group using
vgchange -ay vgdata - Mounting all the filesystems with
mount -a
The mdadm --assemble --scan command is used to reactivate a software RAID array after it has been stopped or after a system reboot. In the context of the “Simulate a full teardown” test case, this command is a crucial step in bringing your RAID array back online.
Essentially, after I’ve stopped the RAID array (as I did in the teardown with mdadm –stop /dev/md0), mdadm –assemble –scan finds all the pieces of your RAID array and puts them back together, making the RAID volume accessible again. This is a vital step in recovering the data and bringing the system back to an operational state after a simulated disaster.
Partition & RAID structure of my RHEL
Final Conclusion
Seeing the system come back to life after such a drastic simulated failure was incredibly reassuring. It proves the resilience of the setup with Tang server, Clevis, LUKS, and RAID. This kind of testing is vital for any large-scale encryption rollout, ensuring you’re prepared for anything.
This approach offers consistent, hands-off unlocking of encrypted volumes, whether on-premise or in the hybrid cloud. It simplifies key management and doesn’t require complex PKI solutions. Plus, it can leverage TPM for enhanced system integrity.
Overall, the results were fantastic. This solution provides a secure and efficient way to manage encrypted volumes, making large-scale rollouts much smoother.